UV Maps
In this post I will explain how I managed to set some properties like length and density for the hair mesh.
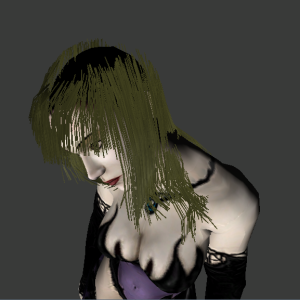
The challenge here was to adapt a well-known technique and use it for these particular features. This technique consisted of UV maps, and was used for Krystal’s skull mesh (the picture from the left), whose UV map looks like this (in the right):
The length map
This is actually very similar to your usual heightmap, especially used for terrains and such, but it is UV mapped.
The data from this image is interpreted also similar to that of a heightmap, but it sets the length of the hair strands in that vicinity and not the height of the mesh, hence the name length map instead of density map.
And an example for a bangs hairstyle is the following UV map (left), having the result from right when applied to Krystal:
The density map
Although the density map looks similar to the other UV map, the length map, getting data from it, is done quite differently.
This is caused by the fact that data from this image is used to generate new data (geometry) as opposed to just refine existent geometry, which is the case with the length map.
Generating new geometry based on a UV map is also used in adaptive tessellation, but there the map used is a displacement map also having information about the direction of the newly created meshes.
For this algorithm to work the mesh has to be composed of triangles and an UV density map has to be specified. The steps of the algorithm are as follows:
- foreach triangle T in the mesh
- find the area A and density D of T
- if D * A * factor > 1 then
- choose a point Y inside T using barycentric coordinates
- delete T and create 3 other triangles based on Y and T
The only things uncommon are choosing a point using barycenctric coordinates and finding out the density of a triangle based on an UV map. Regarding the barycentric coordinates you can check out one of my previous posts, where I also explained this technique when used to generate hair strands. Finding the density of a triangle based on the density map is not hard either, and I tried three ways of doing this, all based on the fact that UV coordinates are known for A, B and C, the points of triangle T.
- The average of A, B and C density
Although this approach evaluates just three points, it gives good enough results when there are plenty triangles to begin with and the UV map is at a lower resolution. Also applying a Gaussian filter on the image at the begging of the algorithm helps.
- The average of the density of the points situated on the Bresenham’s lines of triangle T
Actually I got to admit that this is not my idea, but I heard it from a colleague that used it for a real-time adaptive tessellation application. The main advantage of this approach is that it represents a compromise between speed and information analyzed. Also to improve this way of getting the density of a triangle convolution matrices can be used in order to obtain information from the vicinity of the currently analyzed point as well.
- The sum of all points density in the triangle T
Even though this might be the most obvious way to get the density of a triangle, generating all points inside of a triangle is not that easy. In order to do this I used the ever mentioned barycentric coordinates, but this time they weren’t generated random at all. Having in mind that the area of a triangle, which covers the whole surface of this polygon, is the base multiplied by height and divided by two, generating the first two barycentric coordinates along these lines seemed a good solution. The only problem is that the points further away from the base are analyzed more times (no division by two means passing points in this area more than one time), so doing this operation three times (one time for each base) and then getting the average, gives a very close approximation of the triangle density. Because I do this operation only at the begging I used this last method in the fur plugin implementation, being the best choice regarding the amount of information analyzed.
Next you can see Krystal having just a few hair strands on the top of her skull:
Other UV maps
UV maps can also be used to set various other information about a mesh, such as: the contour of a mesh, which vertices are more important or setting different materials/colors on different hair strands.
I already used UV maps to determine the contour of the geometry and to determine some pivots vertices (as guide ropes). Those pictures look like this, left is the contour:
I haven’t use UV maps to generate various colors for different hair strands, but I have in mind two approaches, and after implementing them I will write another post. However I think my next post will be about the LOD system for the fur plugin which is currently under development.


